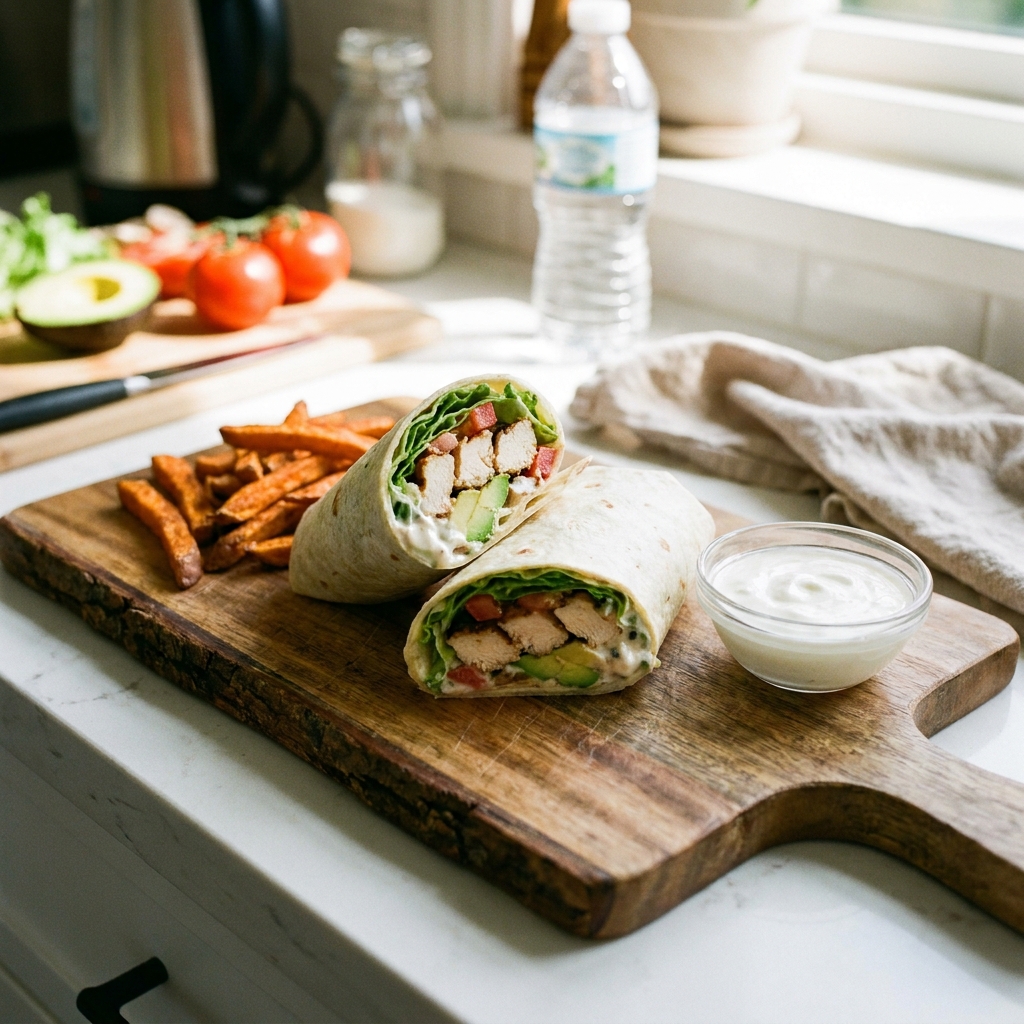
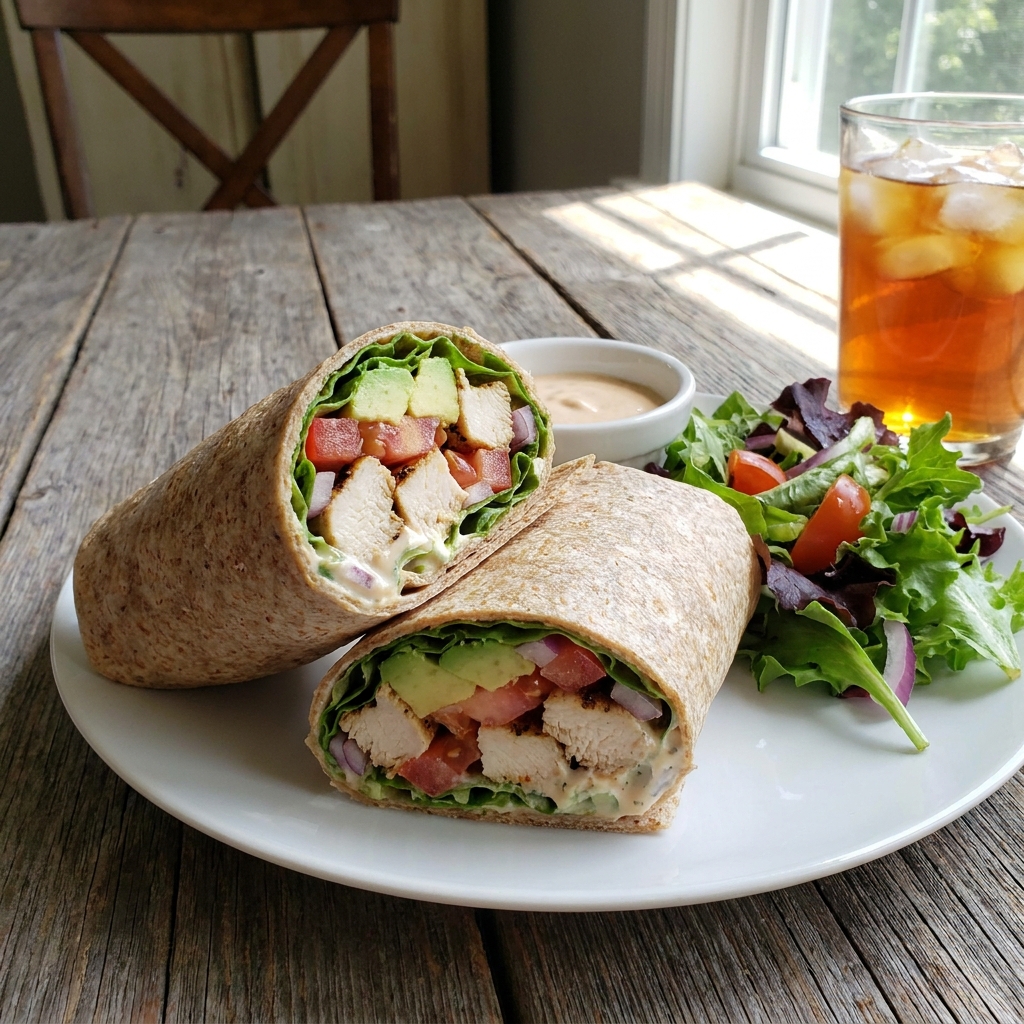
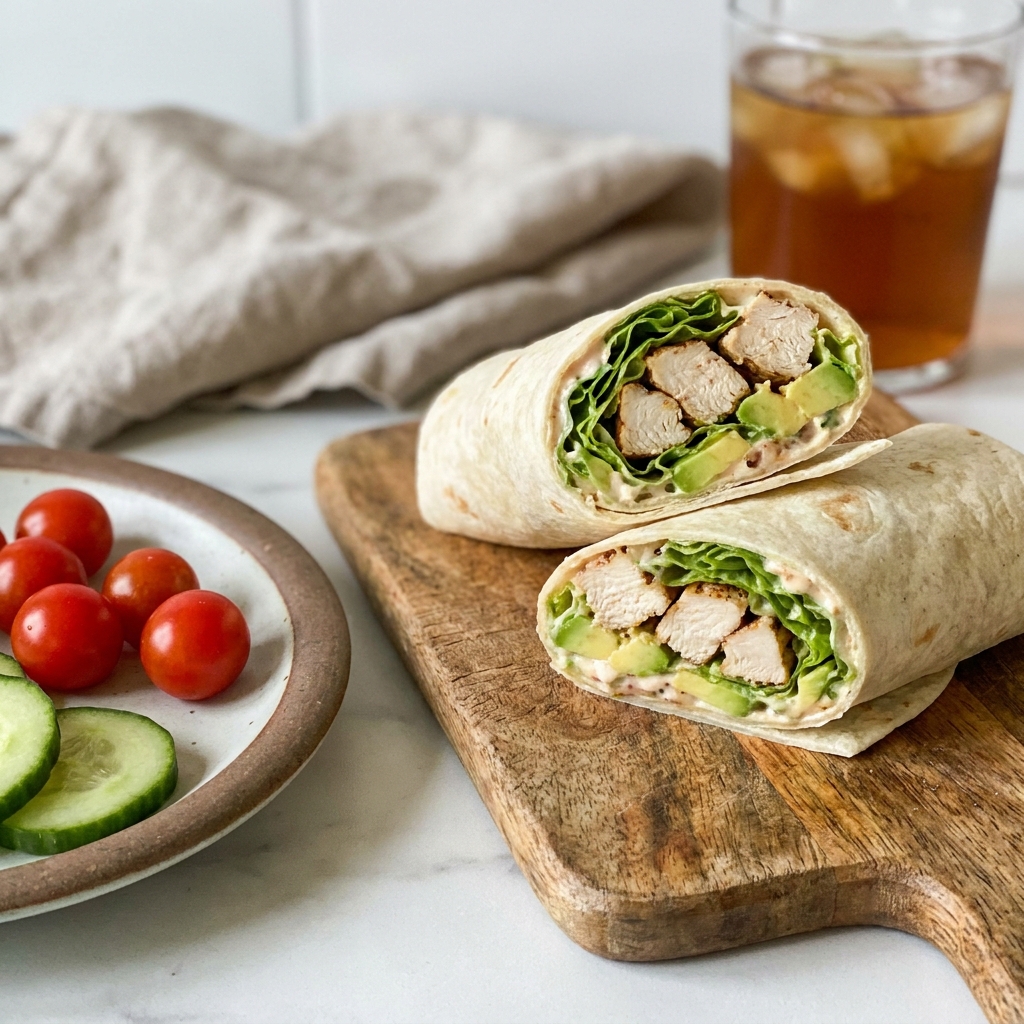
Homemade Chicken Wraps (Quick Lunch Idea)
If you’re looking for a fast, satisfying meal that’s packed with flavor and easy to customize, these Homemade Chicken Wraps are exactly what you need. They’re juicy, fresh, and ready in under 30 minutes — perfect for busy weekdays, quick lunches, meal prep, or even light dinners.
Soft tortillas filled with seasoned chicken, crisp veggies, and a creamy sauce create the perfect balance of texture and flavor. The best part? You can customize them with whatever you have in your fridge.
Once you make these at home, you’ll skip takeout wraps for good.
Why You’ll Love These Chicken Wraps
- Ready in 25–30 minutes
- Perfect for lunch or dinner
- Great for meal prep
- Customizable with your favorite toppings
- Kid-friendly and family-approved
- Budget-friendly and healthier than takeout
These wraps are filling without feeling heavy — fresh, balanced, and packed with protein.
Ingredients You’ll Need
For the Chicken:
- 2 boneless, skinless chicken breasts
- 1 tablespoon olive oil
- 1 teaspoon paprika
- ½ teaspoon garlic powder
- ½ teaspoon onion powder
- ½ teaspoon salt
- ¼ teaspoon black pepper
For the Wraps:
- 4 large flour tortillas
- 1 cup shredded lettuce
- 1 cup diced tomatoes
- ½ cup sliced cucumbers
- ½ cup shredded cheese (cheddar or mozzarella)
- ¼ red onion, thinly sliced
For the Sauce:
- ½ cup mayonnaise or Greek yogurt
- 1 tablespoon lemon juice
- ½ teaspoon garlic powder
- Salt and pepper to taste
Simple ingredients, big flavor.
How to Make Homemade Chicken Wraps
Step 1: Season the Chicken
Pat chicken dry. Mix paprika, garlic powder, onion powder, salt, and pepper. Rub evenly over both sides of the chicken.
Step 2: Cook the Chicken
Heat olive oil in a skillet over medium heat. Cook chicken for 5–7 minutes per side until golden and fully cooked (internal temperature 165°F / 74°C).
Let rest for 5 minutes, then slice into thin strips.
Step 3: Make the Sauce
In a small bowl, mix mayonnaise (or Greek yogurt), lemon juice, garlic powder, salt, and pepper.
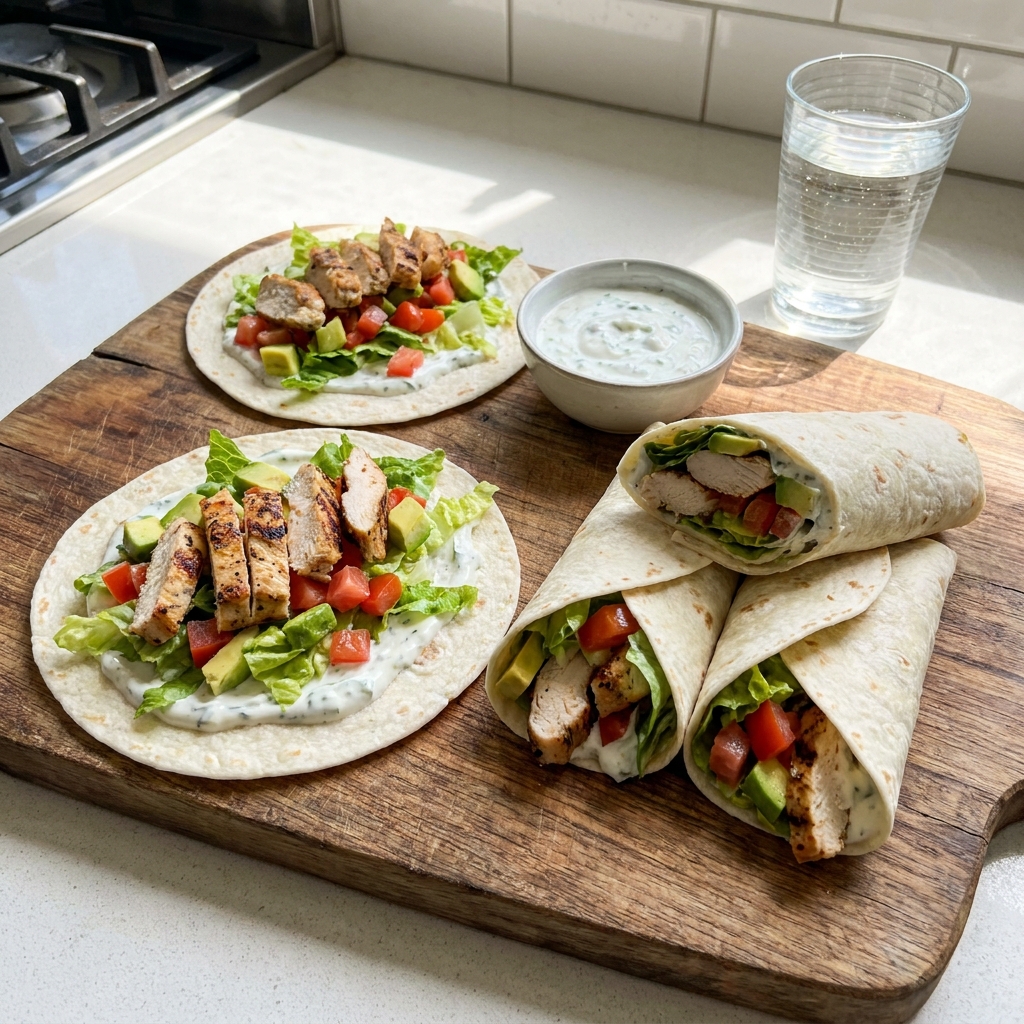
Step 4: Assemble the Wraps
Lay tortilla flat. Spread sauce in the center. Add chicken slices, lettuce, tomatoes, cucumbers, cheese, and onion.
Step 5: Fold and Roll
Fold the bottom up, fold in the sides, then roll tightly into a wrap.
Slice in half and serve immediately.
Tips for Perfect Wraps
- Warm tortillas for 10–15 seconds to prevent tearing
- Don’t overfill the wrap
- Let chicken rest before slicing to keep it juicy
- Spread sauce first so ingredients stick together
Make It Healthier
Want a lighter version?
- Use whole wheat tortillas
- Swap mayo for Greek yogurt
- Add extra veggies
- Skip the cheese
You can easily adapt this recipe to your dietary preferences.
Delicious Variations
1. Spicy Chicken Wrap
Add hot sauce or sliced jalapeños.
2. BBQ Chicken Wrap
Toss chicken in barbecue sauce before assembling.
3. Buffalo Chicken Wrap
Mix chicken with buffalo sauce and add ranch dressing.
4. Mediterranean Wrap
Add feta cheese, olives, and tzatziki sauce.
5. Caesar Chicken Wrap
Add Caesar dressing and parmesan cheese.
So many possibilities with one simple base recipe.
Meal Prep Option
These wraps are excellent for meal prep.
- Store chicken separately in the fridge for up to 3–4 days.
- Chop veggies and keep in airtight containers.
- Assemble fresh when ready to eat.
You can also wrap tightly in foil and refrigerate assembled wraps for up to 24 hours.
What to Serve with Chicken Wraps
Pair these wraps with:
- French fries
- Sweet potato fries
- Side salad
- Fresh fruit
- Soup
- Chips
They’re versatile enough to serve with almost anything.
Frequently Asked Questions
Can I use rotisserie chicken?
Yes! Shred rotisserie chicken for a faster option.
Can I grill the wraps?
Absolutely. Grill 1–2 minutes per side for a crispy exterior.
Can I freeze chicken wraps?
It’s best to freeze the cooked chicken separately. Fresh vegetables may become soggy after freezing.
What tortilla works best?
Large flour tortillas are easiest to roll, but whole wheat or spinach wraps also work well.
Storage Tips
- Store cooked chicken in an airtight container for up to 4 days.
- Keep vegetables separate for best freshness.
- Assembled wraps are best eaten within 24 hours.
Why This Recipe Works
These chicken wraps work because they balance:
- Juicy, seasoned protein
- Crunchy fresh vegetables
- Creamy flavorful sauce
- Soft, warm tortilla
Every bite delivers texture and flavor.
Final Thoughts
These Homemade Chicken Wraps (Quick Lunch Idea) are simple, delicious, and endlessly customizable. They’re perfect for busy days when you want something satisfying without spending hours in the kitchen.
Fresh ingredients. Bold flavors. Ready in minutes.
Make them once, and they’ll become a weekly staple in your kitchen.
Homemade Chicken Wraps
Ingredients
Method
- Season chicken with spices.
- Cook in skillet with olive oil for 5–7 minutes per side.
- Let rest, then slice into strips.
- Mix sauce ingredients.
- Spread sauce on tortilla.
- Add chicken and toppings.
- Fold and roll tightly.
- Slice and serve.
Notes
- Warm tortillas before rolling.
- Add hot sauce for extra spice.
- Store components separately for meal prep.